Tuesday 11 November 2014

I'm back and doing the Sunday Stamper too!

Can't believe it took so long to decorate the craftroom! I had even forgotten all my passwords etc for loading this post! Well I did have a new granddaughter Heidi Barbara Ann, finished a quilt, knitted baby clothes and two cardigans for myself, started a Christmas patchwork runner for the table, kept working, redecorated the dining end of the kitchen - ok, I'm stretching the truth a bit here, but I did keep dear Hubby supplied with refreshments while he did it, went up North to watch the Tour, explored Chatsworth, saw the poppies at the Tower, kept working, did the Beatles tour in Liverpool, had a short break in Cornwall with my dearest friend, kept working oh yes and kept working!
It is so good to be back playing again, here are a few photos of the newly organised craftroom!

P1040158
One Christmas card made, santas sleigh on a dummy run! Ink pads to the ready.
 
P1040164
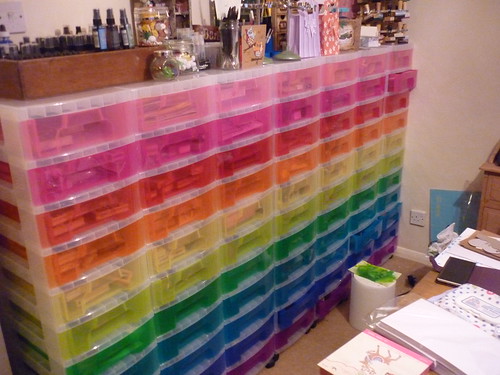
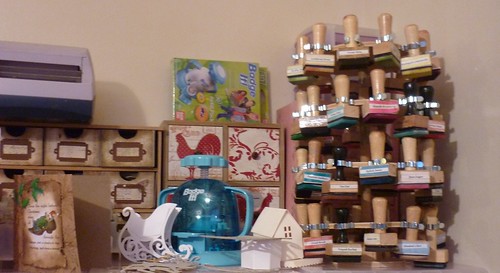
I love my rainbow towers!  Can't find anything yet as labels not on but everything is in there!
 
P1040162
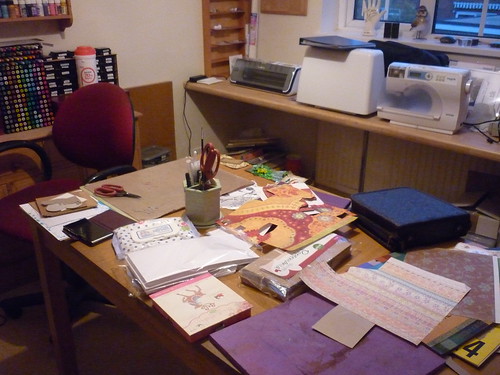
Machines out on the work top. I used to work on a tiny ten inch square of this it got covered in so much! My table top is under siege but I did have four new crafters on Saturday trying it out!
 
P1040161
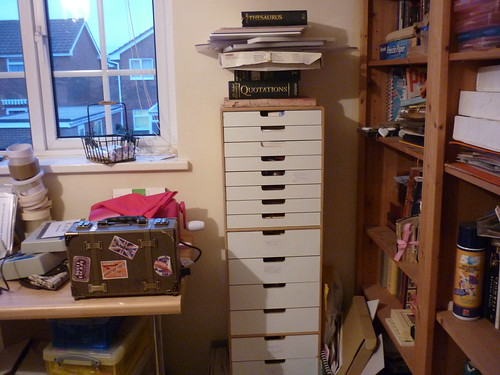
Papers sorted, vagabond at attention, bookshelves cleared of things I will never read again, but full up already!
 
P1040159
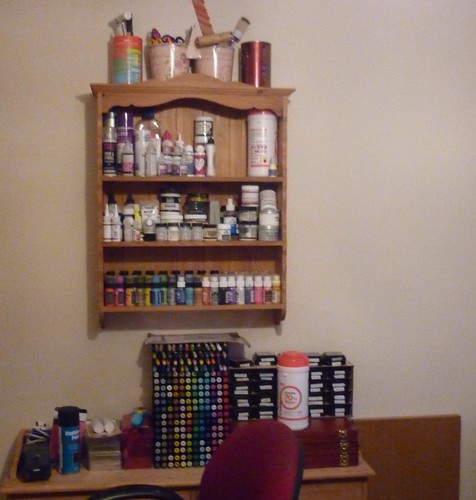
Colour and medium graded. Whoopeee!
 
Now for some work. I have made a fun stamp for Hels Sunday Stamper, the theme is anything Sewing and stitches.
 
Sunday Stamper - Sewing and stitches
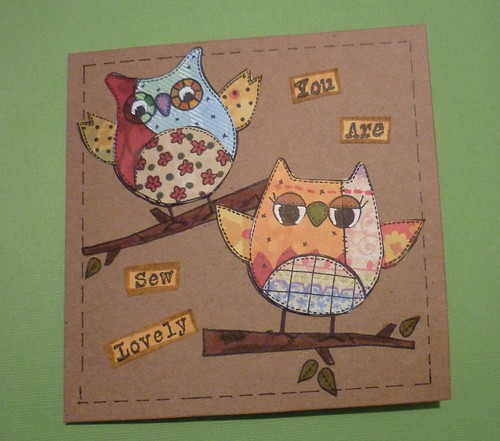
To get me going again I did something simples, and stamped out two patchwork owls and then pieced them with different papers. I got the set some time ago out of a stamping magazine and hadn't used them. Put some faux stitched around and cut up a sentiment from another set. Inky fingers again, loverly! Sometimes simples does it for me. Think my dear friend will be receiving this one!
Thank you if you have called by, I shall post again soon. I went to the NEC on Friday and brought a lovely stamp set for Christmas, so I will show you those!
Goodbye for now from one happy crafter. x

Sunday 31 August 2014

This is just a quick post in despair! Has anyone else experienced redoing their craft room to find that it takes ten times as long as you think? I have thrown out or passed on countless bags of 'stuf' that i either forgot I had or in a fit think I will never use! I have a horrid feeling that I shall need these 'things' in the very near future if I ever get straight and can craft again. I am now pondering whether to buy a cheap kitchen table and chairs for the center of the room so that if I have friends round we could sit at it. I don't know whether this is a good idea or not, but in the past have had to bring down all my gear to the kitchen table if friends want to craft with me. I've purchased some rainbow coloured storage towers for my bits and will be so happy when I can post a completed photo and something I have made! Fingers crossed please peeps that it will not be too long, best crafting wishes to you all and any ideas for craft room heaven will be gratefully received!
I'm now going back upstairs armed with even more black dustbin bags.
This is the first month in years that I have missed doing at least Tim's tag, but I can't remember what drawer I have put things in as the labelling is not done yet.Wish me luck! xx

Thursday 31 July 2014

Tims' tag for July.

I haven't left the country honest! I am trying to re-fit my craft room which has meant taking everything out and stacking it in the spare room, not quite there yet I had more than I realised! I have kept one box of essentials which has meant that I cannot papercraft for a while but I wanted to try and keep up with Tims' tags, here is the link for his July one. Not quite everything I needed to hand but I did my best!

002
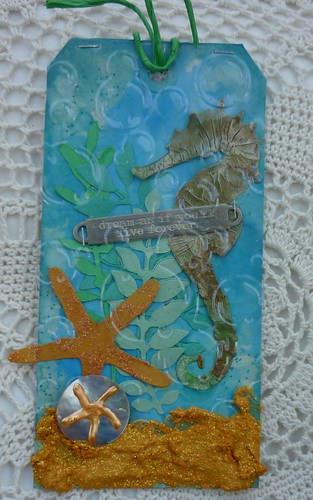
I have put my seahorse under the sea, I didn't mean to but couldn't put my computer in front of me while I worked and so got things slightly different from Tims' tag. Also I can't find the box with all of my distress bits in and the sand is a darker yellow, but I followed the recipe and love the technique! I didn't have the movers and shapers to get the size of the sand dollar right so I used a mother of pearl button and some gold paint that I could reach!
As well as the craft re-furbishment I have had the gift of a new grandchild, Heidi Barbara Ann and she is beautiful. I finished a summer cardigan, the top of a lap quilt, visited Yorkshire to see the Tour begin and am making what feels like hundreds of wedding invitations for my youngest daughter on my lap, so I have kept myself busy - oh yes and work of course!  If you are visiting me and haven't forgotten I exist then thank you so much, I miss you all and hope to be back in full swing in the not too distant future! Big hugs to everyone. xx

Saturday 28 June 2014

Tim's tag for June

I know, absent for ages! My eye has healed nicely now and I have been knitting and sewing which I will blog later, but just in time for Tim's tag for June which you can see here  and I love the stencilling technique he has shown us this month. I thought I would try for a summer version and knew I had some little metal flip flops in my stash that would go well, took me ages to find them tho'! 

002
 
 
003
 
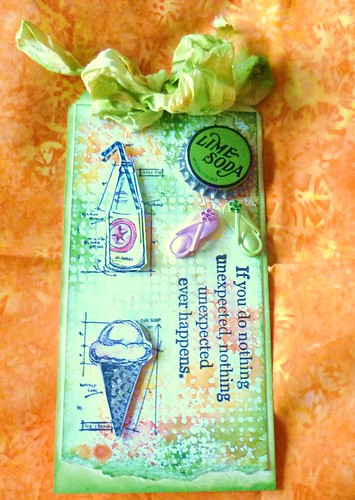
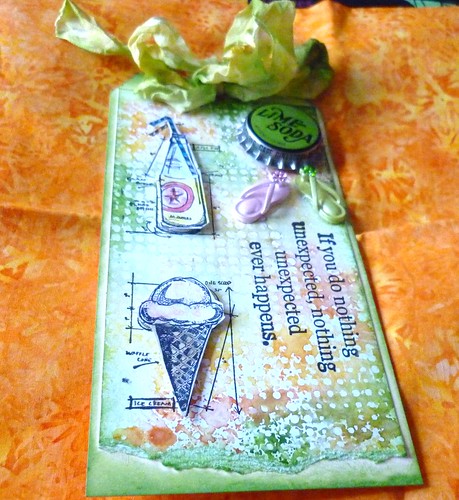
I used his dot fade stencil and Mustard Seed, Squeezed Lemonade and Mowed Lawn DI using his taught method. Then I used the Mini Blueprint 6 set for the pop bottle and ice-cream cone which I layered up. Then the Lime Soda cap  and flip flops seemed to go just right with the sentiment on the side. Love this one Tim, can see me using the stencils for all sorts of backgrounds!
 
Sorry to my dear bogging friends for my absence in leaving comments, hopefully I will get into the rhythm now! See you soon, x.

Tuesday 3 June 2014

A Vintage Journey. challenge 7 - Get Some Texture.

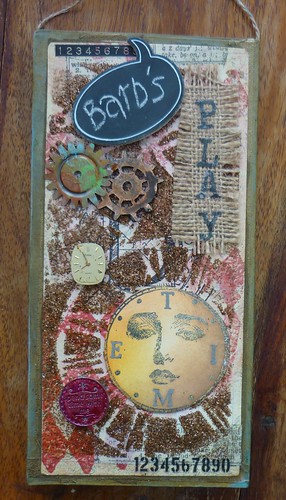
Hi peeps. Feeling a tadge sore today. I won't bore you with gruesome pix but I had a BCC (not nice thingy) removed from my eyelid yesterday. The surgeon was marvelous, I'm glad it's gone but I'm sporting a lovely black eye today and I don't look my best. No work until tomorrow so I thought I would cheer myself up in the craftroom with the Vintage Journey challenge where Jenny from Pushing the Right Buttons has challenged us to make something Tim styled using textures. I decided to make a door hanging for the Craftroom, and as Hubby always asks if I'm off to 'play' that's the theme going on!
 
008
I painted the door hanging first with DS and then cut some manilla card to size. The layers are thus:
 
* I stamped randomly with some Tim stamps but they are covered over now and added some pieces of tissue tape.
* I inked and stencilled with a harlequin background stamp and stencil in DI's  
then I poured clear embossing powder over some of the images. 
* Next I layed the Clock stencil over the top and used Cosmic clear embossing paste over the top and before it was dry I sprinkled DG over the top. When I had brushed off some of the DG the background peeped through.
*Then I found a Time stamp which fitted over one of the clock shapes perfectly.
* Next I used an old clock face, a metal clog that I distressed with DP  and a Shrink Plastic clog that got the same treatment and hot glue gunned them into place.
* The 'Play' was die cut from a decorative strip die and placed over a piece of hesssian.
*The 'spend some time with me'  coin I coloured with alcohol ink.
* The little blackboard was a freebie from a magazine so I added a chalk effect 'Barb's' on top!
* Oh, and I mustn't forget the numbered rub-ons.
 
Quite a few Tim techniques here, but I guess the main one that is relevant to the challenge is to use embossing past through the stencil. See Tim's how to here.
Off now to 'play '-  oh life is so hard sometimes!!!
 

Saturday 24 May 2014

Tims tag for May.

Before I start waxing lyrical about Tims' tag for this month I have to say a big thank you to him for the Tonic shears! Loving my Tim scissors so much I have just invested in a new pair of his bigger shears and they are awesome, cut lovely long pieces straight and are really comfortable to use. A very good investment I think.
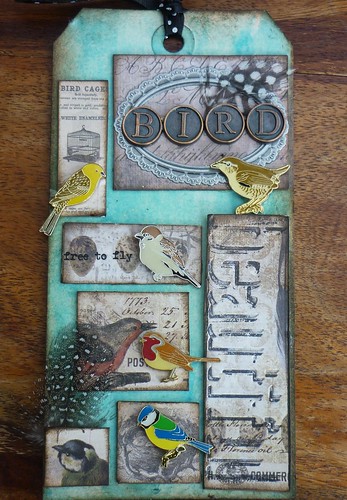
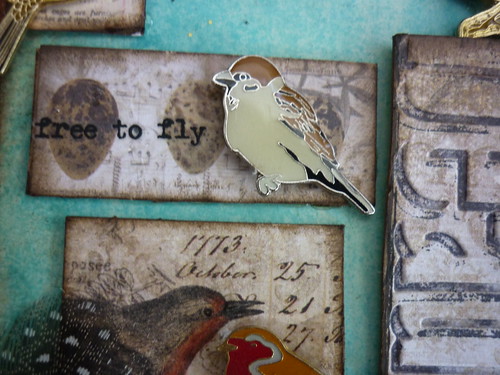
This months tag is beautiful, find Tims here where he has used some lovely treasures on his and invites us to do the same. I have had a small collection of RSPB metal pins for ages - even years, and so decided to use them on my tag.
 
006
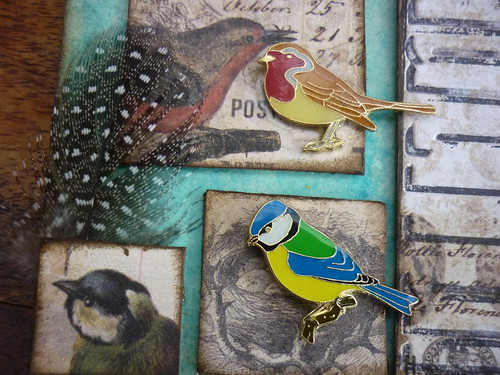
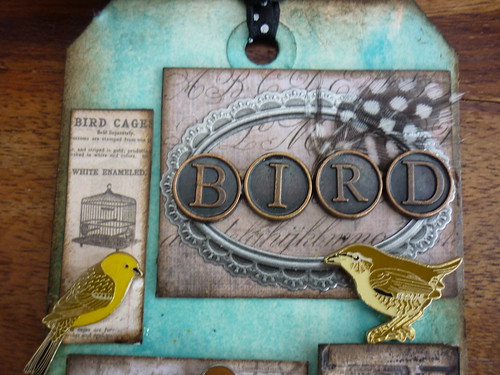
I used different blue DS on the base of my tag against which my  birds can fly off into the summer sky! I love the wildflower paper stash it is my favourite so far, so used the Shadowpress 'beautiful to start me off. Then I cut the back off my little bird pins with my new scissors - so easy to cut so many different materials with them, and used appropriate bird theme pieces of the paper to cover.
 
005 
I also had some beautiful spottted bird feathers that I used, I knew they would be useful one day!
Then I found some metal letters that I put on the metal frame with another feather.
 
003
Here are the other birds.
 
004
I finished it off with some black and white spotted ribbon to match the feathers. I am glad my little metal pins found such a good home! I'm off now to play with my new scissors to cut out some more tiles to put some other treasures on I have unearthed! Have a lovely bank holiday everyone. The sun has just come out again!  X

Thursday 22 May 2014

Compendium of Curiosities 3. Challenge 2.

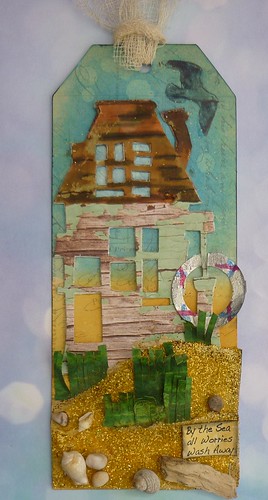
I have enjoyed myself dreaming while I made my contribution to CC 3, hosted by the lovely Linda Ledbetter, press on the LINK here and be transported to the lovely projects everyone has made. The challenge this time is to use Tims' Distress Glitter technique, found on page 56 of his wonderful new book. The added bonus this time is that the challenge is sponsored by the wonderful Linda Coughlin of THE FUNKIE JUNKIE BOUTIQUE with a $25 gift cerfificate to one very lucky wonner. I'm dreaming because I spent last weekend at the seaside, with wonderfull weather here in the UK, so welcome after our wet winter, and all I want is a seaside house so that I can watch the sea and walk along the beach picking up bits and bobs! So I have tried to capture this in my tag,
 
001
I love weather-beaten, so here is my Rickety House, complete with acetate windows, a sea-view and pieces from the beach I picked up on Sunday. I took a Prima tag, used Broken china and Salty Ocean DI on the top half and Spiced Marmalade and Wild Honey DI on the lower half. Then I die cut the Ricketty house from layered Grunge board and paper and coloured the roof with DM's in Walnut Stain, Frayed Burlap and Brushed Corduroy. I made the life belt (incase the sea gets rough) from scrap card coloured with DM's and then I used Tims' glitter technique on two pieces of torn manilla, using Mustard Seed glitter which I shadow inked with Walnut stain. The Sand Dune grass is cut from paper stamped and treated with the various green DI's and then I glued on some tiny pebbles and shells with Glossy Accents. The glitter makes very realistic sand I feel, glittering because the sun is shining! Then I found a small seabird stamp and a tiny sentiment that says it all! I topped it all with some scrim and inked the edges of the tag with Black soot DI.
Wish I was there! Thank you for looking. Love me. x
Tuesday 20 May 2014

A Vintage Journey. Challenge 6. All about Him.

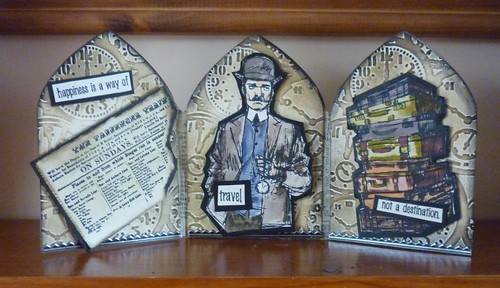
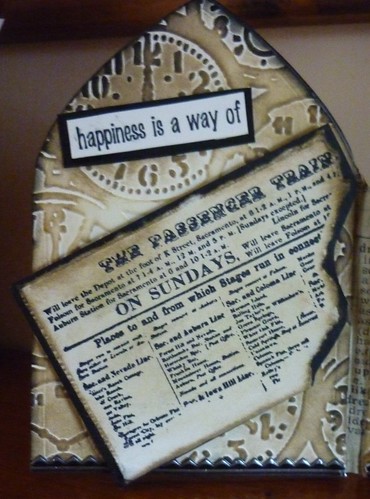
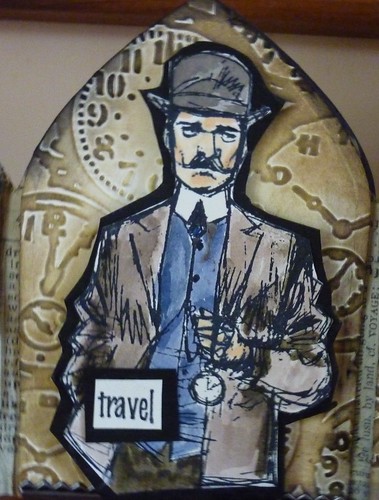
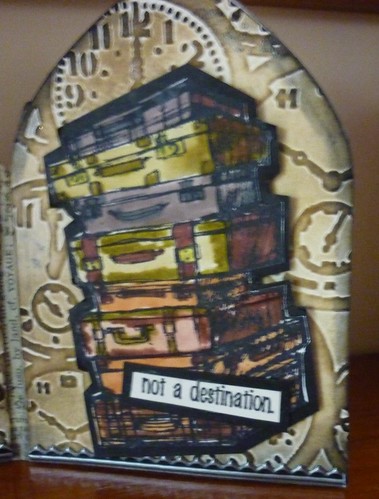
For challenge 6 in a Vintage Jouney (find the link here) Anne has challenged us to use the theme 'All About Him' and some wonderful pieces of art have been made by the Creative Guides of the design team, do click on the link above to have a look. I decided to try and make a triptych using some of Tims' new male stamps.

001
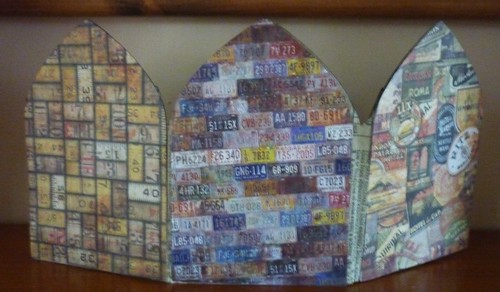
Firstly I cut three arched frames from hardboard and then three more in manilla which I then embossed using the watch folder. I made hinges to keep the frames together from tissue tape which I inked with Walnut Stain DI. After I had inked over the three pieces with Antique Linen, Frayed Burlap and then the edges with Black Soot DI, I stuck them to the hardboard and then covered the back with three Lost and Found papers.
 
004
Then I put some Industrial Stickers on the edge and gentleman and the suitcases from theTime Travelers set onto manila cardstock and colured them in using an assortment of DM's and my water brush. Then I cut them out, adhered them  to some black CS and cut round them again before adding them to the piece with some sticky fixers for dimension. The train timetable came from my stash from so long ago I do not have the manufacturer, sorry! The sentiment is one from Wendy Vecchi which I chopped up and layered onto more black CS.
 
005
 
006
 
007
The wonderful Country View Crafts sponsors this challenge and are offering a £10 gift voucher for the winner chosen by the team! I've been in a bit of a dip lately with my crafting, but anything Tim will fire up the mojo, I love all his wonderful range and if I ever win the lottery I am making a Tim room, full of every single Tim thing! Ah, what a lovely dream.  Thanks for looking. Hugs x

Friday 9 May 2014

Sunday Stamper: Walk of Life.

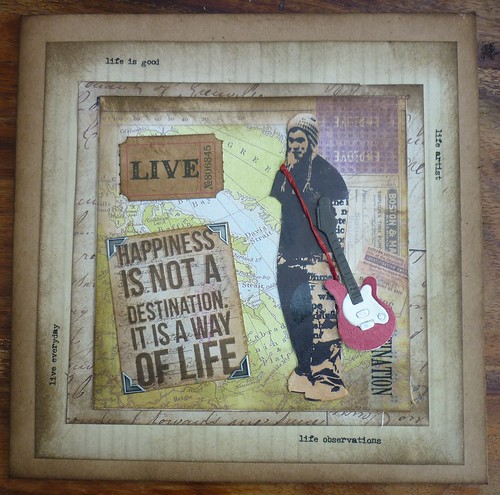
Hi everyone, I don't know about you but I find making mens' cards a challenge and making one for teenage boys even harder. So I thought I would use Hels's wonderful challenge (click here)  to have a go at one and this is what I have come up with.

007
 
Please forgive the photo, my camera is having attention later today! I used a PaperArtsy Urban stamp of a young guy, stamped in archival and layered onto several papers including a map and gave him a cut out guitar and strap. The sentiment stamp is fab and part of my glorious win from Hels last month. then I used a Tim ticket, some metal photo corners and some appropriate rub -ons also Tims' and layered the lot on a Kraft card.
Hope life is making you all smile and be happy?  Dear Hubby brought me an inflatable hot tub for my birthday, so I was happy this morning sitting out under a snatch of sun, easing my arthritis in lovely hot bubbles drinking tea! AAhh life can be so good! Love to you all, thanks for looking. x
Wednesday 7 May 2014

Vintage Journey Challenge 5. Fond Memories.

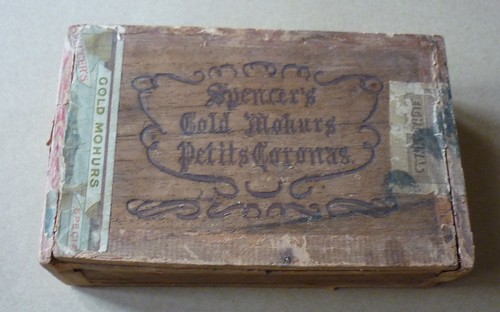
I have always enjoyed picking up things from the forest floor on walks, or shells and pieces of drift wood and the like. When I saw the title for this challenge I thought of when I was a young girl and had boxes that I stored my 'treasures' in. One of the marvelous creative guides, Terry, has altered a cigar box and I remembered I had one squirreled away and I hope she won't mind if I use mine for this challenge!
Here it is before I used some of Tim's wonderful products on it.
 

001
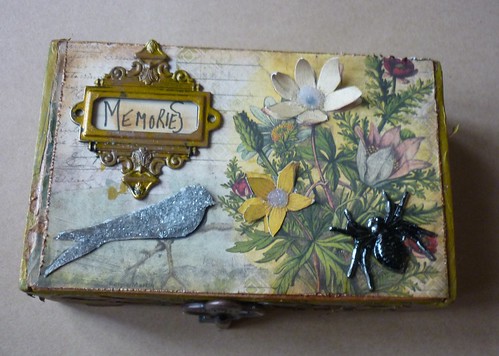
Here it is after its transformation.
 
003
I used the wonderful new Wildflower cardstock and some metal pieces.
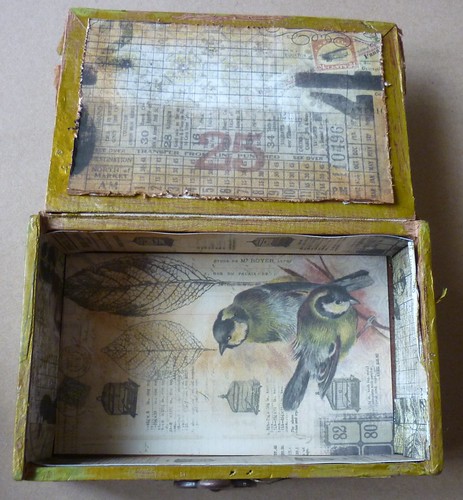
I also covered the inside.
 
006
I used DP in Bundled Sage and Bronze on the outside and then die cut some Trellis pieces for the sides. I ripped and aged the papers. 
The  top was distressed and aged in the same way and then I layered up two of the flowers and the bird and treated them to a layer of Distress glitter. Then an Ornate Frame was coloured with DP and the beetle was coloured with alcohol ink. I'm sorry the photo does not show up the aged effect of the glitter due to the light and the ones I took of the sides of the box did not show at all. My camera needs attention! There is an key that has the word Secret on it on the front. I love that this is so shabby and aged it so reminds me of my little boxes of schoolgirl memories!
As usual Country View Crafts has sponsored this fabulous challenge and if you click here you will be transported to the fabulous challenge and the wonderful work of the creative team!
Make lovely memories this week, and thanks for looking! X

Monday 5 May 2014

Compendium of Curiosities 3 Challenge 1

Sorry I've been a tadge remiss at posting these last two weeks but things have been hectic since Easter! However I had to join in on another great Tim challenge, that is to use his book the Compendium of Curiosities 3 which is packed full of wonderful Tim techniques just like the other two. Linda Ledbetter  hosts this fabulous challenge and you can find the link here and join in all the fun. The first challenge asks us to use his Paint Marbling Technique found in his awesome book.
I have used a tag and Mustard Seed and Spiced Marmalade and Pewter Distress Paint for the background according to Tim's instructions.
 
017
Then I used one of his stencils randomly over some of the background and got out one of my early Tim Stamps, that of the laughing girl and the word Giggle. I put a rub-on crown on her head, some small beads for her necklace and coloured her dress with a DM in Bundled Sage, then inking over the image with Vintage Photo DI and finally using some very old photo corners I found in my stash. 'Imagination' comes from a rub-on too, and the paper chain and book are random small gorjuss stamps that seemed to go well. Then I used three chit chat stickers edged in further DI and two toning buttons and some twine. Then I dyed some Crinkle Ribbon with both DP and DS and left it to dry.
This challenge is sponsored by the lovely folks at Inspiration Emporium who are offering an amazing $50 gift certificate to one lucky winner! There are also some wonderful goodies from Tim and Mario, who could ask for more?
I would like to thank Linda for holding such a fabulous challenge and to all her design team who have made some amazing pieces to inspire us.
Hope you have all had a wonderful Bank holiday, I'm still off tomorrow as it is my birthday so I am still in holiday mood! See you all soon. thank you for looking. x

Monday 21 April 2014

Vintage Journey: Spring Flowers.

I have incorporated the Vintage Journey challenge this fortnight with another charity shop 'find'. First I will show you the 'Spring Flowers'  which is this weeks challenge.

005
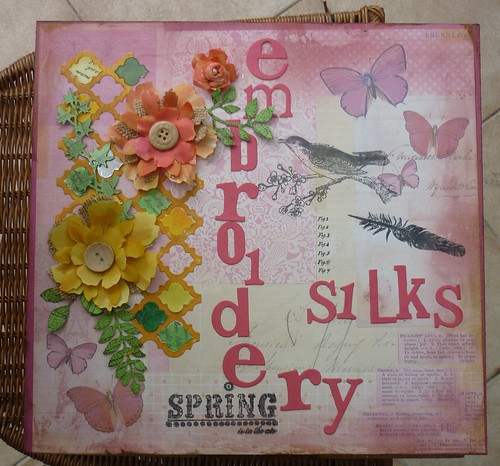
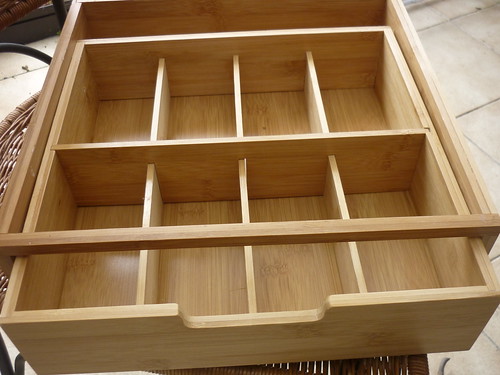
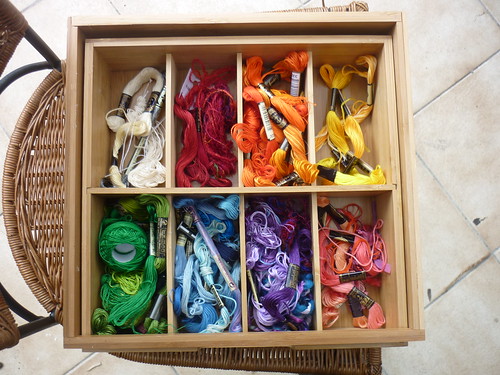
I have used a distressed and stamped background using some of Tim's stamps and some I had in my stash. Then I inked the background edges with Worn Lipstick  and Frayed Burlap DI. Then I used the courtyard on the edge die from Tim, coloured it with DP and then aged it with some Walnut stain DI. I coloured and stamped some of the inside tiles and used a mirror tile as Tim did in this months tag. The flowers are his tattered florals die and I used Buckram coloured with alcohol ink and then added a little one made form his tattered pinecone die. I also put in some hessian pieces and wooden buttons for texture. I stamped and coloured with DI on the greenery die and then used Word Play for the words. Why Embroidery silks I hear you musing? Well I have just enrolled on a City and Guilds course to learn Stumpwork embroidery and needed somewhere to store all my threads. Hence this bargain picked up in our local Hospice charity shop for the stunning price of £2.99p!
 
002
I think it was a sock drawer that nobody wanted and it is beautifully made. Next step was to get
colour co-ordinated!
 
004
Then cut some hardboard to go over the top and decorated it with the theme for a Vintage Journey, Spring Flowers......
 
007
My new thread box!
Now I have to get my head round trying to stitch a branch of an orange tree with leaves and fruit in stumpwork. I hope I haven't bitten off more than I can chew, I'll keep you posted!
Hope you are all having a wonderful Easter holiday. Thanks for looking xx

Wednesday 16 April 2014

How lucky am I?

I have just got in from work and look what was waiting for me!

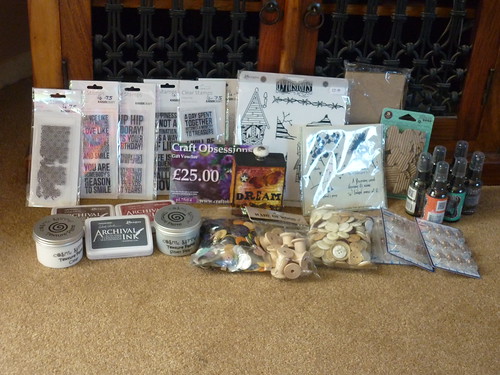
003
This is the fabulous haul from Hel's give-away that I won the other week. Isn't it wonderful? Thank you so much Hel's I am going to have the bestest time playing with all this! Can't wait to get my fingers inky. I will post my first make as soon as I can!
Have a lovely week everyone. xx

Monday 14 April 2014

Sunday Stamper: Flame Colours.

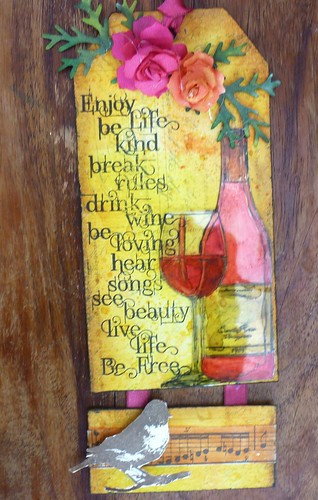
A great challenge to get us in a sunny Spring mood over on Hel's challenge the Sunday Stamper this week! She has asked us to use Flame colours - yellows oranges and reds. I thought I would incorporate an old stamp I have not used for ages and this is what I have come up with.

002
I took a Prima tag and chopped the end off. Then I inked the background with Squeezed Lemonade and Mustard Seed and Spiced Marmalade inks with some flicking and swiping going on! Then I stamped the sentiment which is from the  Indigo Blu 'Enjoy Life' set. The bottle of wine and glass from Stamps Happen Inc. I forgot I had, but was having a tidy up and there it was. I have just invested in a set of alcohol markers and so I stamped it on acetate and had fun colouring it in  with my new pens, they work really well. Being on a roll with little roses from Tim's April Tag I coloured some Buckram with the same markers (I have Spectrum Noir) and then rolled them up, I thought they looked quite real being fabric. The spare piece of tag I layered with a piece of tissue tape and a Tim bird stamp from one of his older sets stamped in Archival Potting Soil. The markers coloured the ribbons that I used at the top of the tag and the hinges so easily.
I hope you all have a wonderful sunny week full of these lovely colours! Thank you so much for looking and for your lovely comments, I so enjoy reading them. Be back soon. X
 

Friday 11 April 2014

Sunday Stampers: Nature.

Hi everyone. I have been very busy this week and so I am entering a double page of my sketch book for Hels challenge this week, as I have not developed the ideas into a finished piece yet. I have also been very very lucky and have won her fabulous give-away of absolutely tons of goodies (see here) which are arriving very soon. I will take lots of pix to show you when they come and am very delighted and grateful, I've never won such a big prize before! Also crafters are such lovely people as you left some lovely comments on Hels blog wishing me joy, thank you everso much!
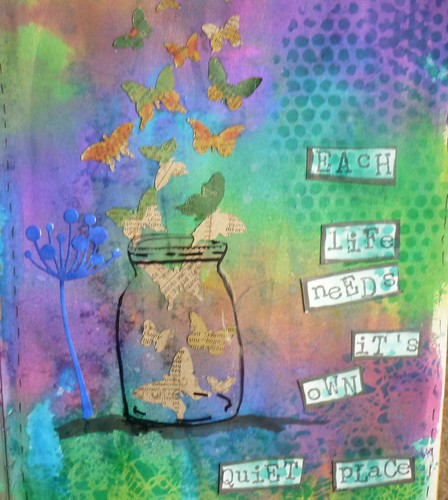
Back to the challenge. I have recently got my mits on Tim's butterfly die and I must admit I saw an idea of them coming out of a bottle on line, but I can't find it again. If you are the person, great idea, I hope you don't mind that I have adapted it. I thought I would have the butterflies changing into colour as they emerge into the light. I love the sentiment from Stampotique but it wasn't big enough when I stamped it, so I did it again with my alphabet stamps. The background is Dylusion spray inks, the Mason jar is from crescendoH stamps cut from a piece of acrylic packing and if you look closely you may see two of Tim's stencils and a die cut flower head giving texture.
 

003
I have a feeling I may work on this as a piece of embroidery or a small wall quilt, I am trying to develop the idea of my own designs, a work in progress as they say!
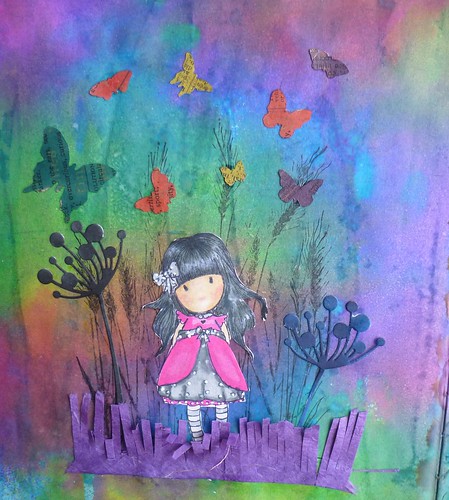
The other page is a little different for me. I don't usually do these type of images, but purchased the Gorjuss image and have had a go with my new set of alcohol markers at shading her in. Then I put her against a Hero Art stamp of corn with two more die cut flower heads and some butterflies, then cut some purple grass from handmade paper.
 
004
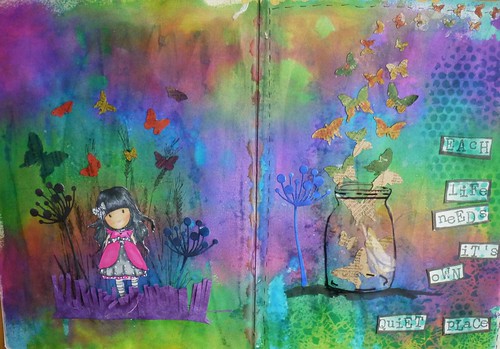
Here is another photo of the double page.
 
001
It has been my resolution to use my sketch books more. I love how the Dylusion ink looks so vibrant. I think either has the potential for a card or a small quilt do you?
Thanks for peeping, nearly the end of the week! Where is the time going? x

Monday 7 April 2014

Tim's tag for April

This is a most beautiful tag and my favourite of Tim's thus far this year! It has also taught me a valuable lesson which I shall share with you! I have always struggled fiddling with those little roses from the pine cone die, in fact I have always struggled with the pine cone! I would watch the video and would hot foot up to the craft room and then do my best to emulate the Master. This time I took my lap top up to the craft room and followed him step by step which is what I should have done in the first place! I was not creasing down the little petal parts and as Tim says that really helps to form the shape. Smacked wrists Barbara, pay attention and do as the expert says!

004
So here it is, as faithful a copy as I can manage and I am now on a roll with the little roses. You can find Tim's stunning original here - thanks Tim, I love this one! x

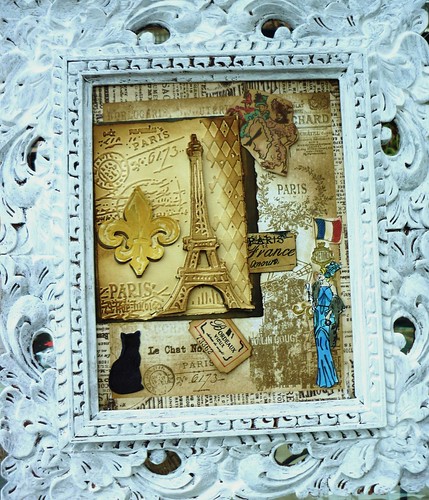
A Vintage Journey - A Little Bit French!

Continuing with the Vintage Journey challenge which you can find if you press the link, the theme this week is 'A Little Bit French' and my word I didn't realise how many French stamps etc come from the Master of all things Inky - Tim Holtz! I was spoilt for choice and in the end decided to shabby chic a Charity shop frame I found.
Then I took a canvas board and proceeded to 'Timinise' it!
 
003
The background stamps are all stamped in Potting Soil Archival then then distressed with Frayed Burlap DI with the exception of the Metro and black cat stamp. Then I painted and distressed a piece of french script paper from one of Tim's collections and ran the French embossing folder through the old Vagabond and then inked over with Walnut Stain and Frayed Burlap DI. Then I die cut and seperately embossed the fleur-de-lys and inked them with Walnut stain and then gold Viva paste and layered them up with several layers on sticky fixers. The Moulin Rouge Can-Can dancers and elegant Parisian lady were in my stash and I made up some tickets to pop in the side of the main frame. The edge was made from Tissue tape with suitable French words on and then I painted and distressed the frame with white acrylic paint.
Do pop over and have a go if you aren't participating already, it's great fun and is sponsored by Country View Crafts, so one lucky person will win a voucher to spend in their fab shop. The design members have come up with some great French inspired art, do have a peep.
Thanks for looking, be back soon. x

Friday 28 March 2014

Sunday Stamper: week 300 Dream Lover.

I love Hels challenge  over on the Sunday Stamper but have been a bit remiss lately, leaving my offerings too late to post, but here is my card in time (just) for Hels 300th challenge! Well done Hels, you continue to be a wonderful inspiration to many.
 
003
For this card I kept to a purple/lilac tone of DI's on plain card using the spritz and flick method for the background and one of Tim's classic initial stamps that I still have wood mounted for the top and which I built up using sticky fixers. I layered with plain purple CS and then die cut a Sizzix thinlits by Susan Tierney-Cockburn, called The Magnolia, out of Buckram and dyed it with more DS. The little tag has a punched bottom and 'Dare to Dream' from Tims' little phrases set. The leaves are from his new greenery decorative strip. The flower was easy to put together and I do think it looks exactly like The President that climbs up my pergola which has a purple edged center. Well ok, perhaps I do need a tadge of artistic license or could it be practice, but it is nice to have another type of flower to make!
Hope you are all having a great week. Thanks for looking! x

Sunday 23 March 2014

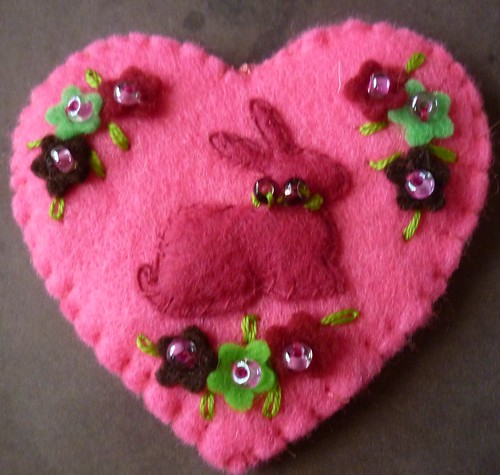
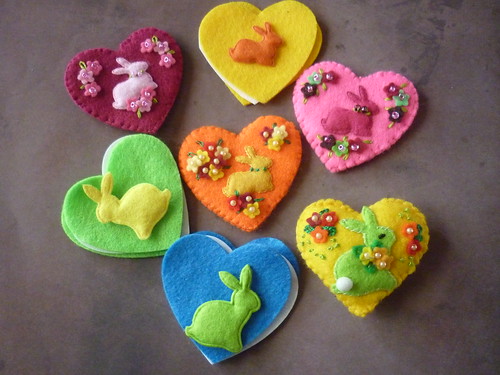
Third post of the day and Bunny Brooches!!

My goodness am I having a lovely play day, so here is my third post (I know, it's a miracle). I have been watching a lovely Barbra Srteisand film, (I love that woman) and making some fat free Easter gifts while I enjoyed watching.

012
I have long admired the lovely felt hearts made by Beedeebabee and although these are nothing like her fabulous creations they are my first and were fun to make! 
 
013
Not as tasty as chocolate but kinder on the hips! Hope you are all enjoying your day.
Thanks for looking! x

A Vintage Journey: week 2.

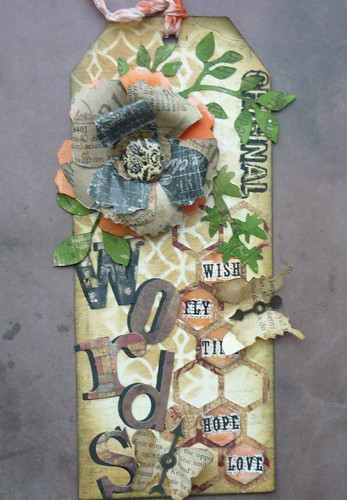
Gosh look at this, second blog of the day! Here is my offering for the second week of A Vintage Journey a fabulous new challenge which features all that is the man Tim! This fortnight the challenge is to 'Say it with words' using anything you like in the style of Tim Holtz.
I'm in a roll again with tags, so this week I used a Prima tag mainly because I love the size which isn't quite as massive as a #12 manilla but a bit bigger than a #8!


010
I flicked and swished Frayed Burlap and Antique Linen DI on the background and then using the new Lattice stencil I went over it with more Frayed burlap. Next I inked the edges with Walnut Stain and then Black Soot to bring the tag in. I used my new Honeycomb Framelit over some patterned vellum and then cut out again with palin which CS. Taking some of the insets I used word rub-ons which fit perfectly and stained the edges with Ripe Persimmon and Black Soot, then inserted them into some of the spaces. Next I die cut (using my vagabond of course!) 'words' from word play and used Tims technique of shadowing each letter with plain black CS as he showed us once on a Christmas tag. The tattered floral was cut from various Tim papers and then I used my new Spring Greenery decorative strip which I coloured with Peeled Paint and Mowed Lawn DS. The butterflies are cut from book paper and the centers are ideology clock hands. Stained crinkle ribbon and a wooden button complete the Tim tag. Thank you to Country View Crafts who are giving a Ten pound voucher to one lucky participant!
I may wash my  inky fingers and have a little sewing spree now, who knows, I may get three posts on in one day! Thanks for looking. x

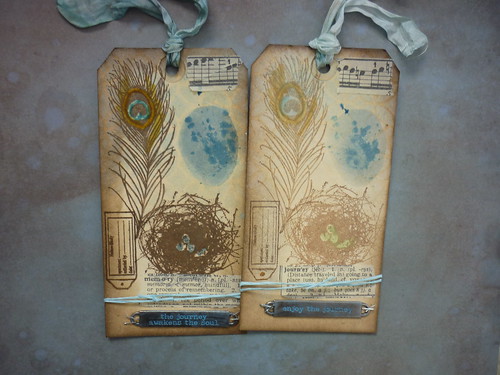
Tim's tags for March

I love Tim's tags this month with the shadow stamping technique. Makes me realise how much ink I must wipe off in the course of a crafting  session! To see how Tim has done it please click here and enjoy! I did not have the appropriate stamp set but loved the look, so have done my best with what I had in my stash.
 
003
I used antiuqe linen DI  on the background, a feather stamp I have had for ages and Tim's blueprint Easter set for the nest. The egg was a challenge, so I cut out an oval shape for a stencil and used weathered wood DI watered down on my craft sheet and then used a portion of his bitty grunge slodge stamp for the pattern on the egg. I did not have anything that I could use for the 'fig' words so I stamped a nature found tag on the side. I love the colours of his distress blues against the muted browns and was glad I could even colour the ribbon at the top with one paler than the other just by misting the ribbon with more water. Great tag Tim, thank you for the inspiration.
It is hailing fit to burst at the moment so I am going to enjoy a Sunday playing with the heating on!
Love to all, thanks for looking. x

Tuesday 18 March 2014

Ice Ice Ice Nice Iceland!

Hi everyone, I know that my blog is usually the bits and pieces I enjoy making but I had to change course a trifle and write about our fabulous long weekend in Iceland. Magical that's all I can say, we went with number 1 and number 3 daughter (no.2 is a mum and expecting  our second grandchild.)  It was a present from Kate our eldest as while we were away we celebrated our 45th wedding anniversary. One of the best trips I have ever been on I think!
The first day we donned sea gear and went whale watching and saw hump-backed whales and one of the first minky whales of the Spring that had been spotted.
 

iceland march 2014 014
This was a view from the boat, doesn't do it justice.
Here are the four of us in our sea going outfits, it was hysterical trying to get into them!
Even my eyeballs felt as if they were freezing at one point.
 
IMG_3786
 This is a pair of show-offs that swam alongside the boat for quite a while, beautiful creatures.
IMG_3953
We swam in the Blue Lagoon, the girls went horse riding over lava fields and then we did the Golden Circle tour where we visited stunning waterfalls:
 
IMG_4063
Hot spurting Geysers:
 
IMG_4094
Then chased the Northern Lights, but unfortunately in four nights we didn't see them, still a good excuse to return again in the future!
 
IMG_4135
At about minus five degrees it was so cold! Still we were well wrapped up and the full moon was stunning.
Here is a fabulous sign that we spotted in Reykjavik:
 
iceland march 2014 034
Don't you just think Tim should turn this into a stamp? Brilliant! I didn't leave hubby in there though, he's my bestest friend and I wanted him with me,
Thanks Jack for 45 years of being with me, I love you to bits.
 
iceland march 2014 090
I  shall be back crafting asap. See you soon! x

Sunday 9 March 2014

A Vintage Journey begins!

I have managed to wake the old mojo up by telling it about the super new challenge blog over at  A Vintage Journey which is to focus on the shabby vintage style, ideas, techniques and products of none other than Tim Holtz, so what better reason does a girl need to shake off the post Christmas doldrums and get crafting? The first challenge is to begin with 'Anything Tim' so here is my offering and of course it had to be a tag, because what else is so Tim like to start on?

001
I have used a super size manilla tag for the first time and have enjoyed the space to play on! I covered the surface with DI's, spritzing an swiping as Tim has taught us to do. Then I overstamped with Potting Soil archival ink with the apothercary script and ruler stamp and then the spider and web in the corner all from Tim's collections and then die cut on my Vagabond the Weathered Clock using some of Tim's papers. I attached the hands with a brad and coloured the center with alcohol ink and bashed it (technical term) with his texture hammer. Next I stamped The Chemist onto white card which I coloured with DM's and did the same to the bottles and potions stamp. These were then layered up with sticky fixers. The text is part of Good Thoughts stamp set which I cut up seperately. I used chit chat stickers across the apron, rub-on 'pointing hands' at the top and bottom and then corked vials coloured with alcohol ink adhered with glossy accents and a tiny label from the Mini  Halloween 3 set. A piece of 'Curiosity' tissue tape is at the bottom, with a matching Word Band distressed with DP and attached with the Tiny attacher. The edge of the tag was given the Paper Distresser treatment and then edged with Black Soot ink and everything was cut out with his Tonic scissors over my Ranger craft sheet and dried with my Ranger heat tool. Finally I used his Crinkle Ribbon, given the DS treatment and dried in a scrunch. The skeletal head comes from Mini Halloween 3 and was stamped onto Clearly for Art that had his Frosted film put over it and then cut out and heat shaped and attached to the ribbon with a mini Clip Board Clip.
I reckon this is 'Timmed' enough don't you? It makes me realise how much I rely on his products and how many I have already! Quite a lot of these I buy from Country View Crafts who offer a very fast and efficient service including free delivery and who I note are sponsering this challenge every week!
That's me done and dusted, I have enjoyed this, perhaps Mr Mojo will hang around, thanks for looking and for kind comments left. Have a happy week. x