Tuesday, 28 May 2013

Sunday Stampers: Some like it hot!

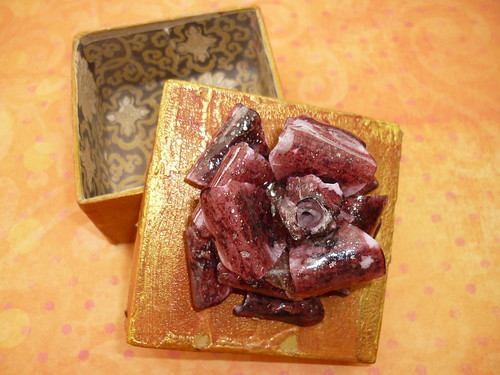
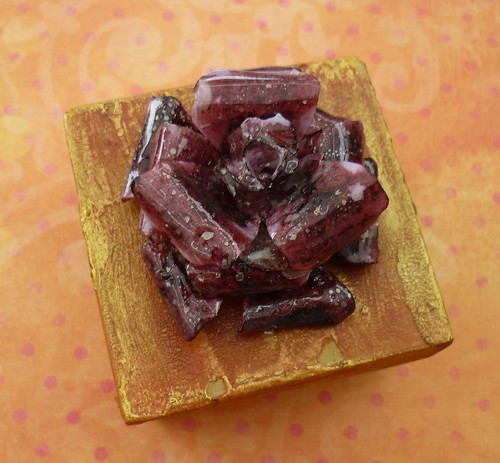
I surely surely would......like it hot that is! I'm contemplating putting the heating on again! On to warmer thoughts, Hels has challenged us to use the melt pot this week and so I had to make one of the faux porcelain flower roses and have put it on top of a little box to hold a gift for someone special. 

005 008
I crackle painted a little box with red and gold acrylic paint and some distressing paste I had, I know that you can buy paint ready crackled which is easier but I wanted to use this up. I deliberately did it roughly as I wanted it to look old. Then I made the rose by stamping out the rose onto some patterned paper that I then covered in aged mahogany ink and then I dipped each layer in hot UTE before assembling. I tried to make some drips as if it had just rained (I looked for inspiration outside the window - ha ha) and then stuck it on top of the box with some spare UTE. I lined the box with a piece of gold patterned paper and now it is ready to hold some tissue paper and some jewellery I am trying to make! I am imagining everyone playing with their melt pots this week, what a great challenge, I shall off to enjoy everyone's masterpieces now! Have a lovely week. x

Wednesday, 22 May 2013

Tim's Tag for May.

Well, I managed to get most of the pieces for this month's tag for Tim's 12 tags of 2013. I have fallen for those enamel tags when you put rub-ons over alcohol ink. What a fabulous technique for future projects, that's one of the best bits of doing the tags, not only following the Master but getting new ideas for your stash. Mind you my craftroom is overflowing but some things you just have to have!
 

002
I used slightly diferent colours and accent stamps but had Mona on wood, she was one of my first stamps and I've used her a lot in the past, it was good to get her out again! The only thing I don't possess is the texture hammer, but methinks I will have to put it on my list as I can see what a difference it makes. It's all in the details! Great rub-ons, I usually have an aversion to them but as usual the King of all Things Distressed has come up trumps again! Thanks Tim, I enjoyed this one.

Tuesday, 21 May 2013

Give away winner.

I don't know why it is but I am just not very good at I.T. I tried to copy the random generator thingy to post the result on here, but I can't and so I hope you will all take my word for it when I tell you I entered the numbers and comment 7 was selected who is - tarantara - Carole Z! Thank you to all of you who commented and to all my lovely followers, I really appreciate it. I shall Email you with my email Carole, and post the sketch book kit with some extra papers as soon as I get your address. Hope to be back soon with something to show but having a busy work week and can't get into the craftroom. 'See' you all soon! x

Monday, 13 May 2013

Many Many Thanks! A small Tutorial and giveaway.

I can't believe that over fifty very kind bloggers have elected to follow my funny offerings. I want to say a very big THANK YOU to everyone of you and for all the kind comments that you have left me since I started. I thought that I would try and post a small tutorial and offer a small giveaway as a sign of my appreciation to you all. So here goes:
 
Some years ago I tried a technique from Somerset Studio magazine, but I can't find the  article so I must have thrown it out. It was how to make a piece of mosaic paper using a paper shredder. As far as I remember it went like this:
First take an asssortment of papers up to about five different ones about the same weight. Put them through a paper shredder.

004
I had to bring it downstairs to the conservatory to get the right light, so here are a few of the strips. then you glue them in alternate layers on another piece of paper. I used glossy accents glue to make sure they were stuck down well.
007
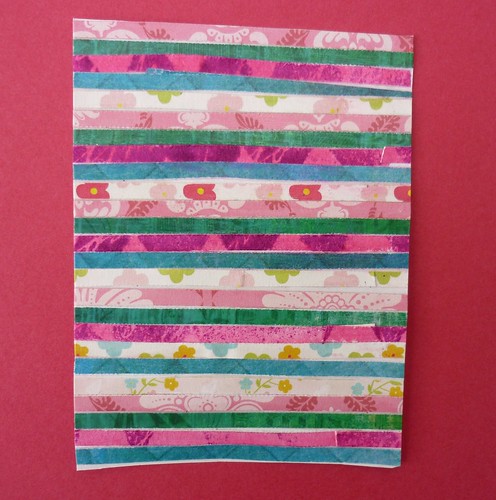
I trimmed the edges and then when it was thoroughly dry I put it through the shredder again and stuck down the new strips onto another thin piece of paper.
008
When this is dry you can do what you want with it, die cut, trim etc. Here is a little note book I covered with wallpaper sample strips.
 
012
On this one I managed to alternate the strips to make a chevron pattern, then I used a monogram stamp onto some heated craft  foam that I coloured with pearlised gold powder. I added a wine glass charm of a Bottle, no no, because it starts with a B - honest! Well ok, I do enjoy an occasional glass of Boly darling! So as a thank you card for all of you out there I die cut my little sample into a heart and used it to decorate a small cover of a journal.
015
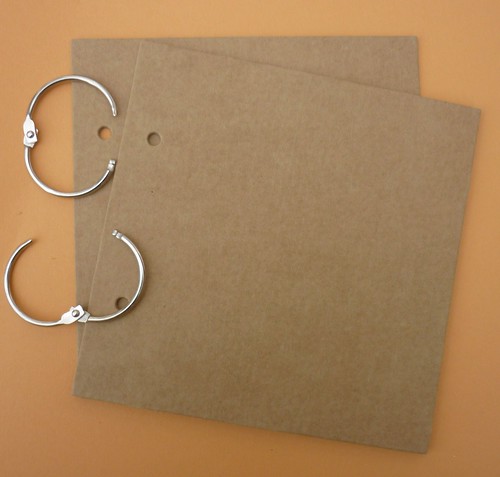
 So my small giveaway is a blank journal you can cover for yourself, perhaps using this shredding technique.
017
I will add some blank sketch book pages for the middle and will  random thingy number any one who leaves a comment by next Monday.
So, first tutorial out of the way, hope it was useful, if there are any tips out there for improvement I'd love to hear from you. Many thanks dear followers and commentors! Have a happy week. x

Sunday Stampers: Simply Irresistable.

Hi everyone. I have been a very busy bee this morning and will now put on two posts! The first has to be Hels weekly Sunday stampers challenge, which is to use some form of resist. I've made a card which has turned out a tadge Autumnal, but that is because of the branches as much as the colour!
003
I used a set of Wendy Vecchi stamps and stamped the background with resist ink before sloshing it all over with Squeezed Lemonade, Rusty Hinge and Spiced Marmalade distress stains, then mopping some up with a damp towel before drying. The flower was from the same  set and  I used embossing ink to stamp it before colouring it in again withWalnut Stain and  Ripe Persimmon stains. The branch side die was cut out of stiff brown card and then I layered up the card, stained ribbon and tied on a piece of junk jewellery that had leaves on it  that I dabbed over with Peeled Paint distress paint. I love the way you can use that over metal and it tones in. I'm now going to try and post a tutorial so watch this space!

Friday, 10 May 2013

Sunday Stampers: Diamonds and Pearls.

I am in a very pink and happy mood this week as I have had a birthday and got spoilt through and through. So to celebrate I have made a happy pink tag for Hels Sunday Stamper challenge this week.
004  

 
The base was a mop up of pink and pewter distress paints from a previous project. I stamped a diamond background with plum archival ink and then I embossed the frame through it and stamped the little girl from a Paper Artsy set. Then I die cut a butterfly from pearlised silver paper, sorry it doesn't show up too well, then cut it in two for her wings. I had a practice on an enamelled tag before I try Tims May tag, but it is fiddly and the 'in' is wonky! Then I punched a lace border from a Martha Stewart  punch and added a piece of old junk shop necklace that had 'Diamonds and Pearls' on it. I found a lovely pearl button and a fabric covered wooden bird in my stash and added a word band attached with pink twine. The ribbon was stained to match.
I am off now to play with my brand new Overlocker! Told you I was spoilt rotten! Hope to be back soon, who knows perhaps I'll veer away from paper and try and show you a new top with posh overlocked seems! Have a happy crafting time everyone - xx